Showing posts with label Distress marker. Show all posts

Monday, February 8, 2016

The Daily Marker 30 day challenge - Week one recap (Day 3)

Hi everyone here again with my recap of The Daily Marker 30 day challenge. 

Day 3 - Blooming watercolor

Today's post is using one of my Favorite techniques I call Emboss it, Drop it, Blend it and Voila! I don't really call it that but I thought it was cute (haha) Seriously though I love how this looks on any project. All you do is stamp your Favorite image on Watercolor paper with Versamark (use a stamp that has some white space that you can color), add embossing powder and heat it up to melt the powder, draw some color into the white space ( two levels of the same color per petal/stem), take your Watercolor brush (not too much water on it) and blend. If you find that you need more dimension just wait for it to dry and add more colour where you need it. That's it! It's that easy - Really it is and it takes hardly any time to create these lovely little bouquets.

I originally started with the gold one but wanted to try one with clear embossing powder as well. It's a toss up for me which one I like better. The elegant gold or the ethereal clear???


Supplies: My go to Watercolor paper (Strathmore yellowbook), Tim Holtz Flower Garden cling stamps, Ranger Queens gold embossing powder, Clear embossing powder, Tim Holtz Distress Markers in (Purple flower- Seedless preserves, Wilted violet, Spiced marmalade, Fired brick, Carved pumpkin), (Red flower- Candied apple, Fired brick), (Teal flower - Lucky clover, Cracked pistachio, Lemon citron), (Stems - Forest moss, Peeled paint)

Saturday, September 26, 2015

Birds and the Bees repost

Hi all,

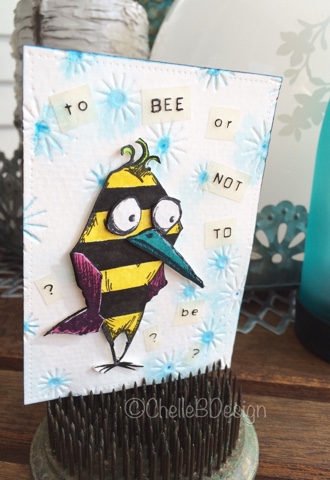
I'm back today with a project I created about 9 months ago. I was involved in an ATC challenge themed "Birds and Bees" and I was lucky to borrow my good friend Barb's Bird Crazy stamps by my favourite guy Mr. Tim Holtz.  Here is my original project from Pinterest.


I had the bird part covered but was perplexed as to how to incorporate the bee part into my ATC. Finally I had this crazy, and aren't these birds all about crazy, idea to stripe my bird like a bee. Voila, birds and bee all rolled into one! Now to come up with a quote for the card. Lucky me that Barb was around and came up with the quote "to bee or not to be". How fitting! Thanks Barb!!

My handsome bird/bee has drawn a bit of attention on Pinterest so I thought I would recreate him, with a couple of tweaks, for my blog and here it is. 


First I embossed a piece of watercolour paper with my new Tim Holtz/Sizzix embossing folder "Sparkle". Then I coloured in the center of each sparkle with my Mermaid Lagoon distress marker. I gave the paper a few spritz of water with my mini mister to help the distress ink spread. Then I put that aside to dry. 


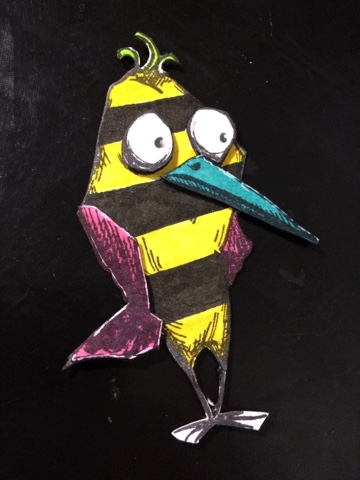
I stamped Mr. Bird twice onto my watercolor paper. One is for the main bird and the second is for his wing, beak and eyes. I cut those out and set aside. 


My first colouring was the bird base with the stripes on it. With a light coloured pencil I drew my stripes onto the bird as a guide. 


Then I coloured in my yellow and black stripes. Next I coloured in the wings, beak and tuft of hair. Even though these will be covered by my second layers I still like to colour them in as that layer will be popped up.  


Final step was to color in the second layers. 


After colouring I assembled my bird. I added pop dots to the second layers of the bird and placed them onto the first layer. I did take a gelly roll white pen and added a bit of highlighting to that second layer to add some depth. 


Using my Dymo machine I spelled out my quote in two different fonts. I find it adds a bit more visual interest if you mix up your fonts a bit. I cut those out into individual words. 


I placed them onto my background sparkle embossed paper once it had dried. I used a Faber Castell Pitt pen to make the words stand out on the white background. The words were a little too light without the added black. 

Lastly I added Mr. Bird and there we are. 


I hope this inspires you to think outside the "bird" and to try something a little different.